

JB Garage Conversions
Step-by-Step Guide · JB Garage Conversions

How to Convert a Garage: A Step-by-Step UK Guide

By James Benton, Director of JB Garage ConversionsLast reviewed:
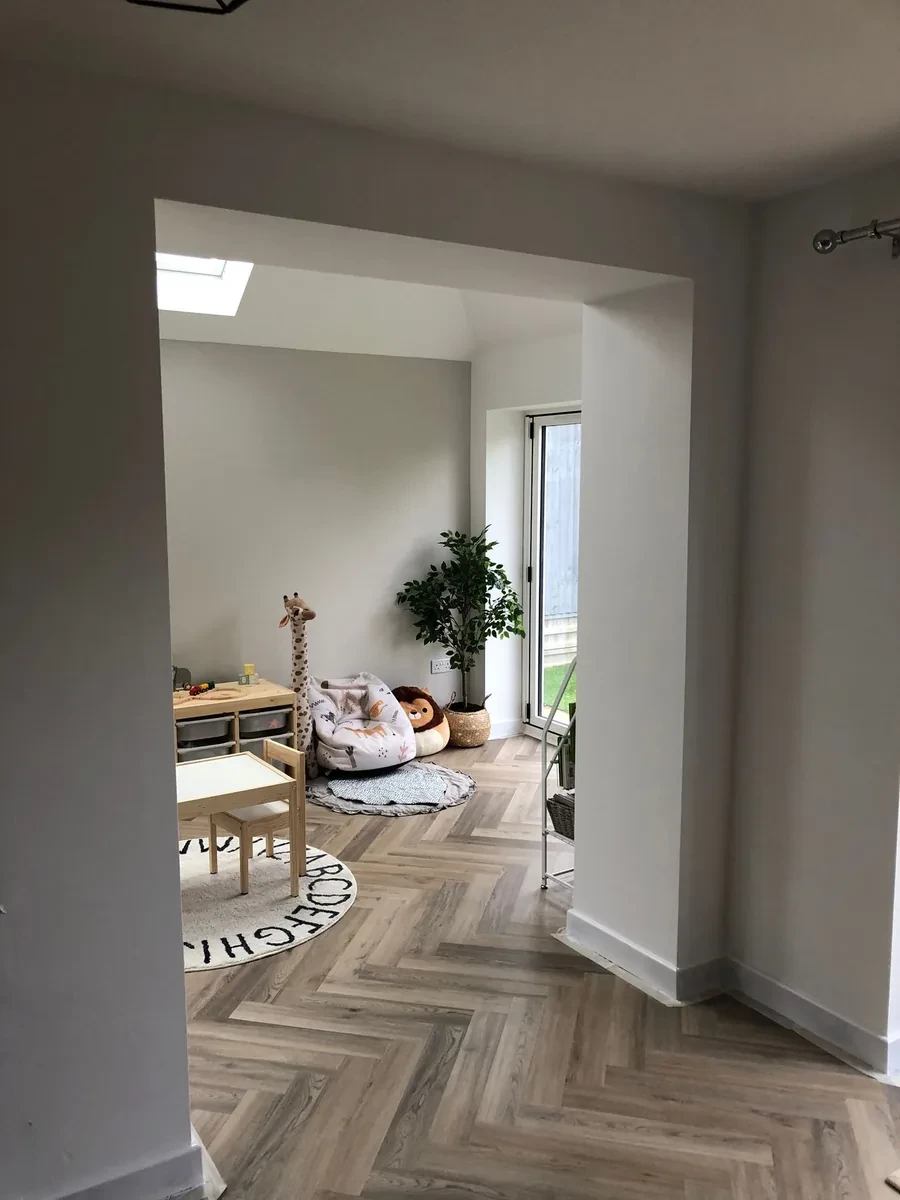
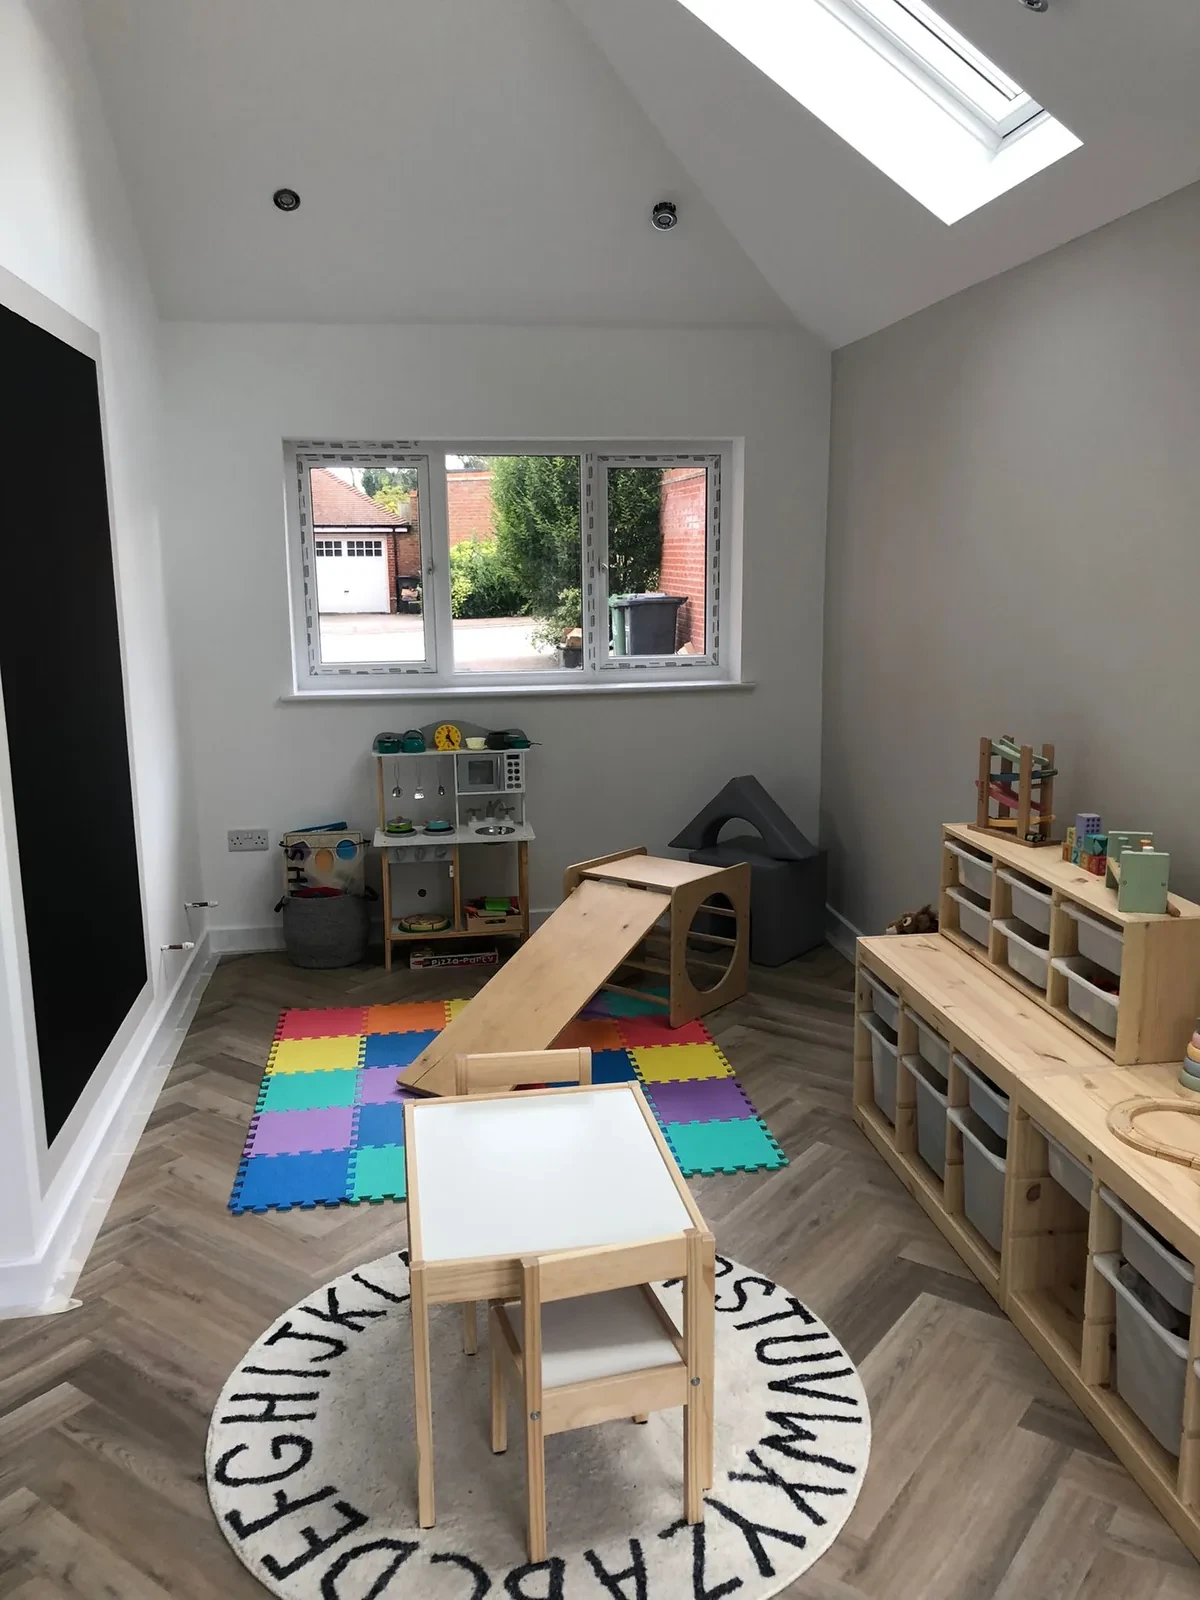
Completed full garage conversion into a bright family room — Huxley Close project by JB Garage Conversions

Huxley Close — full single garage conversion completed by JB Garage Conversions

A well-designed garage conversion can turn an underused storage area into a warm, comfortable room without changing the footprint of your home. It can become an office, playroom, bedroom, gym, utility room or an open-plan extension to the existing living space.

The important word is well-designed. A garage was not normally built to perform like a habitable room. Its floor, walls, roof, openings, ventilation and services must be assessed as a complete system. Covering a cold wall with plasterboard may improve its appearance, but it does not deal with structural suitability, ground moisture, heat loss, condensation, fire safety or electrical compliance.

This guide explains the correct project sequence at a high level, the questions to ask at each stage and when professional input is essential. It is not a construction specification, and it should not be used as a substitute for drawings, structural calculations, building-control approval or competent trades.

Quick answer

Start with a site survey and a clear room brief. Check planning restrictions, arrange building-control approval, establish whether the existing foundations and floor are suitable, design a continuous damp-resistant and insulated envelope, coordinate structure and services, complete the work in the agreed inspection sequence, and obtain the final certificates. Do not conceal structural, thermal, drainage or electrical work before it has been inspected or recorded.

Can You Convert A Garage Yourself?

A capable homeowner can manage parts of a garage conversion project, but very few conversions are suitable as a completely DIY build.

The lower-risk homeowner tasks are usually defining the brief, comparing quotations, choosing finishes, maintaining a project record and, where agreed with the contractor, completing simple decorating after the technical work has been signed off. Tasks that affect structure, moisture resistance, fire safety, gas, drainage, electrical safety or the thermal envelope require competent design and installation.

A sensible division of responsibility

Homeowner-led tasksWork requiring a competent professional or project-specific approval
Decide how the room will be usedStructural openings, lintels, steel beams and load-bearing alterations
Prepare a list of sockets, lighting and storage needsAssessing foundations, slabs and the suitability of the existing structure
Choose windows, doors, flooring and decorationDamp-proof courses, membranes and below-ground moisture design
Compare itemised quotations and programmesGas work, notifiable electrical work and drainage alterations
Keep photographs, certificates and product informationRoof alterations, fire-safety design and escape provisions
Carry out decorating only when appropriate and agreedThermal, ventilation and condensation-control design

If a garage may contain asbestos-containing materials, do not drill, cut, break or remove suspect boards, roof sheets, textured coatings, insulation or service components. The Health and Safety Executive explains that refurbishment surveys are intended to locate hidden asbestos-containing materials before work disturbs the fabric of a building. A competent surveyor should establish the correct survey scope.

1

Step 1: Decide How The Room Will Be Used

The proposed use affects almost every technical decision. A dry home office is different from a shower room, utility room, bedroom or self-contained annexe.

Before requesting quotations, write a brief covering:

  • whether the whole garage or only part of it will be converted;
  • whether some secure garage storage must remain;
  • how the new room will connect to the house;
  • the number and position of windows and external doors;
  • heating, hot-water, plumbing and ventilation requirements;
  • lighting, sockets, data and media points;
  • fitted storage, a kitchenette or bathroom;
  • accessibility requirements;
  • the target finish, flooring and decoration; and
  • whether the conversion could become sleeping accommodation.

This is also the right time to decide whether the project is a partial garage conversion, full single garage conversion or double garage conversion. A partial conversion can preserve practical storage, but the dividing construction must be designed so that the retained garage does not compromise the comfort, fire safety or moisture performance of the new room.
2

Step 2: Survey The Existing Garage

Do not price or design a conversion from floor area alone. The survey should identify what already exists and what must change.

Structure and geometry

Check the wall construction, roof form, visible movement or cracking, floor level, ceiling height and the relationship with the main house. An integral garage may share walls and a roof with the dwelling, while a detached garage may need a different strategy for services, access and weather protection. Where a garage door will be removed and replaced with masonry, windows or doors, the survey must consider the support beneath the new wall and the support above the opening. The visible concrete floor is not proof that suitable foundations exist at the front of the garage.

Floor and external ground levels

Garage floors are often lower than the house and may slope towards the door. Measure the available build-up before selecting a floor system. A designer must reconcile insulation, moisture protection, finished floor level, thresholds, headroom and any existing air bricks or sub-floor ventilation. External paving and ground levels also matter. Rainwater should be directed away from the new frontage, and the damp-proof course and thresholds must not be bridged by paths, drives or raised landscaping.

Moisture, ventilation and condition

Look for water staining, salt deposits, mould, blocked ventilation, roof leaks, defective gutters and damp around the garage door or wall bases. A new lining should not hide an active defect. The cause must be understood and corrected first.

Services and hazards

Record the consumer unit, sockets, lighting, boilers, meters, pipework, drains and ventilation terminals. Check whether services need moving and whether future access must be retained. Consider an asbestos refurbishment survey where the age, materials or planned disturbance make this appropriate.

3

Step 3: Check Planning Permission And Other Restrictions

In England, planning permission is not usually required when a garage conversion is internal and does not enlarge the building. However, that is a starting point rather than a guarantee.

Check with the local planning authority if:

  • the property is on a newer development where a condition may require the garage to remain available for parking;
  • permitted-development rights have been removed;
  • the house is listed or in a conservation area;
  • the work materially changes the external appearance;
  • the garage is detached or the proposal changes its use more substantially;
  • the conversion creates a separate dwelling or self-contained unit;
  • the property is a flat, maisonette or converted building; or
  • an Article 4 direction or local restriction may apply.

The Planning Portal garage-conversion guidance confirms that internal work without enlargement will not usually need planning permission, while also warning that local restrictions and removed permitted-development rights can change the answer.

Read our dedicated guide to garage-conversion planning permission for a fuller homeowner checklist.

Planning permission is separate from building regulations. You may also need to check restrictive covenants, leasehold consent, lender conditions, insurer requirements and the Party Wall etc. Act. Government guidance says notice may be required for work to a party wall, a new wall at a boundary or certain excavations close to neighbouring structures.

4

Step 4: Arrange Building-Control Approval

The conversion of all or part of a garage into habitable space will normally require approval under the Building Regulations. This is true even where planning permission is not required.

For a normal house in England, the building-control route may use the local authority or a private registered building-control approver. With the local authority, the application may use full plans or, where permitted and suitable, a building notice. A registered building-control approver instead gives the local authority an initial notice. Full plans provide more certainty before construction; a building notice can suit some smaller local-authority projects but does not provide the same formal pre-start approval.

Building-control requirements may cover:

  • Part A — Structure: foundations, walls, floors, roofs, lintels and beams;
  • Part B — Fire safety: warning, escape, fire separation and material performance;
  • Part C — Moisture: damp, contaminants, ground moisture and condensation;
  • Part E — Resistance to sound: where separating construction is relevant;
  • Part F — Ventilation: background, purge and extract ventilation;
  • Part G — Sanitation and hot-water safety: if bathrooms or hot water are added;
  • Part H — Drainage: new or altered waste and rainwater systems;
  • Part K — Safety in use: glazing, impact and level changes;
  • Part L — Energy performance: insulation, thermal bridging, windows, doors and services;
  • Part M — Access: where applicable to the alteration; and
  • Part P — Electrical safety: electrical work in dwellings.

The exact requirements depend on the existing property, the proposed use and the current rules when the application is made. Approved Documents give recognised ways to demonstrate compliance, but they are not a universal construction specification. Review our garage-conversion building-regulations guide, then agree the project-specific solution with the designer and building-control body.

5

Step 5: Finalise The Design And Work Sequence

The design should be coordinated before materials are ordered or demolition begins. At minimum, the contractor and homeowner should be able to identify:

  • the final room layout and dimensions;
  • all structural openings and supporting details;
  • the approved wall, floor and roof build-ups;
  • continuity between the damp-proof course and floor membrane;
  • insulation thicknesses and thermal-bridge details;
  • ventilation routes that must remain unobstructed;
  • window, door, glazing and threshold specifications;
  • fire detection and escape requirements;
  • electrical, heating, plumbing and drainage routes;
  • inspection points before work is concealed; and
  • responsibility for applications, calculations, certificates and final sign-off.

Who May Need To Contribute?

RoleWhen to involve themTypical contribution
Designer or architectWhen layout, external appearance, junction details or coordination needs a drawn and specified solution.Measured proposals, drawings, specifications and coordination information appropriate to the job.
Structural engineerWhen a loadbearing wall is opened, an RSJ or lintel is needed, the roof is altered or existing support is uncertain.Project-specific calculations and structural details for the agreed design.
Building-control bodyTo assess the Building Regulations route, review information and inspect relevant stages.Regulatory assessment and inspection records; building control does not replace the project designer or site manager.
Conversion contractorTo test buildability, sequence the work and price the agreed scope before construction.An itemised quotation and construction delivery that follows the coordinated design and approval process.

Agree responsibilities in writing. The GOV.UK Building Regulations approval guide explains the approval routes and the owner's responsibilities; an approval or inspection does not turn building control into the project designer.

A detailed quotation should state what is supplied and fitted, the work sequence, exclusions, provisional items, payment stages and how changes will be agreed. A short quotation with phrases such as "insulate and board garage" is not enough to compare technical quality.

6

Step 6: Strip Out Safely

Strip-out exposes the real condition of the garage. It may reveal a different floor construction, concealed damp, inadequate support, redundant services or materials that require specialist handling.

Before removal starts:

  • isolate services using competent trades;
  • confirm the asbestos strategy;
  • protect occupied areas of the house from dust and weather;
  • support anything that depends on the element being removed;
  • agree temporary security after the garage door comes out; and
  • record concealed conditions with photographs.

Do not remove a load-bearing wall, cut roof members, alter a lintel or disturb an unknown board simply because it appears straightforward. Temporary works can be as important as the finished structure.

7

Step 7: Confirm Foundations, Floor And Damp Protection

Foundations beneath the new frontage

The former garage-door opening is one of the most common areas requiring investigation. New masonry may need a new foundation, but the correct solution depends on the existing foundations, ground conditions, loading, nearby drainage and the design of the new frontage. Trial holes and structural assessment may show that an existing foundation or structural floor is adequate. In other cases, a new trench foundation, ground beam or alternative engineered solution is required. Foundation depth must not be selected from a generic internet detail: tree influence, made ground, clay, neighbouring foundations and drains can all change the design.

Existing slab or suspended floor

An existing slab must be checked for condition, thickness, level, damp protection and its ability to receive the proposed build-up. The main options are usually an upgraded solid floor or an insulated suspended floor, but neither is automatically correct. A solid-floor strategy may involve moisture protection, insulation and a screed or structural topping. A suspended timber strategy needs suitable support, ventilation, moisture management and a detailed connection to the existing house. The chosen build-up must achieve a stable, dry and thermally efficient floor without blocking required sub-floor airflow.

DPC, DPM and continuity

The damp-proof course in the walls and the damp-proof membrane in the floor should form a continuous protective layer. Poor laps, punctures, bridged thresholds and discontinuity at the new frontage are common failure points. Approved Document C covers resistance to ground moisture, rain penetration and condensation. The site-specific design should also deal with external levels, cavities, wall ties, weep details, drainage and vulnerable junctions. Photograph membranes and junctions before they are concealed.

8

Step 8: Complete Structural Alterations

Structural work can include:

  • removing the garage door and constructing the new frontage;
  • installing windows, bifold doors or an external door;
  • forming a wider opening into the existing house;
  • installing steel beams or lintels;
  • altering roof trusses, rafters or ceiling members; and
  • creating new support for walls, floors or roof loads.

Any load-bearing alteration should be designed by a competent person, normally with structural calculations. The contractor must follow the specified bearing, connection, corrosion protection, restraint and fire-protection details. Building control may need to inspect foundations, masonry, lintels, beams and connections before they are covered.

The structural stage is not the place for improvised substitutions. If the work on site differs from the drawing, pause and have the change reviewed.

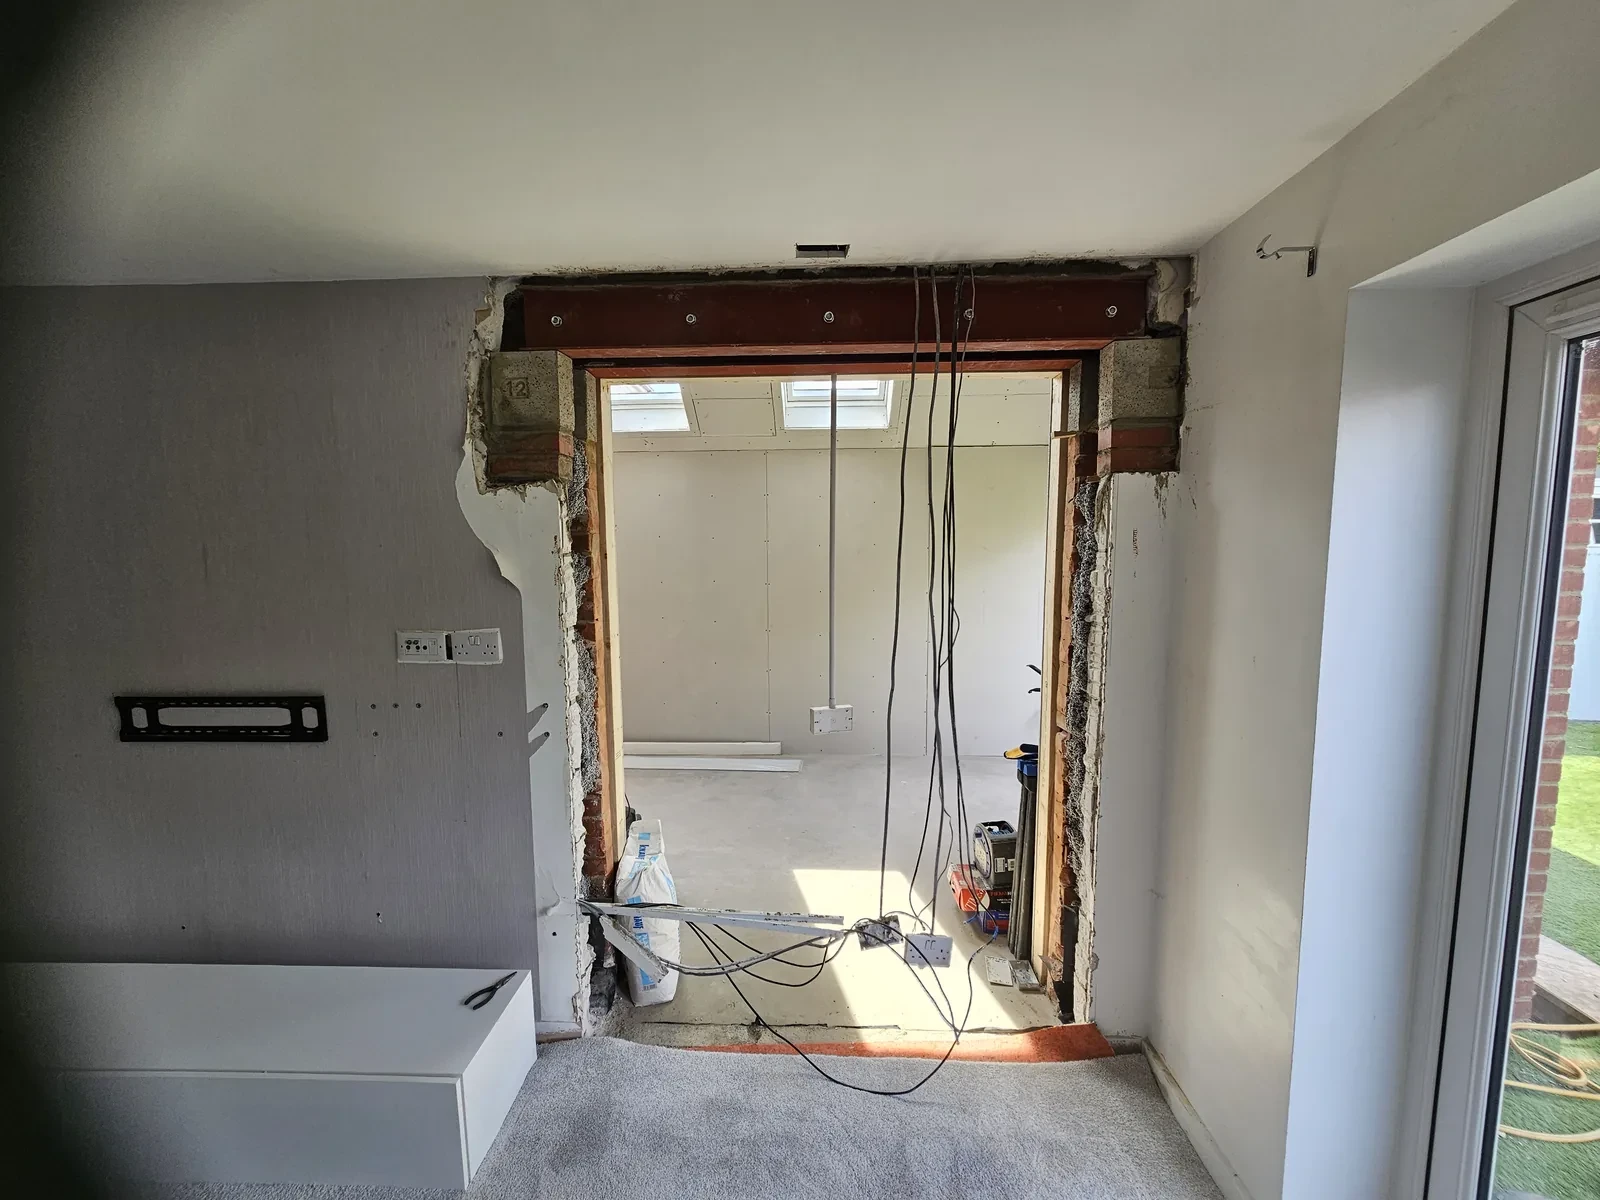
Our Huxley Close garage-conversion case study shows how a more involved conversion can combine structural work, a revised roof form, rooflights and a high-quality internal finish.

Structural opening formed during the Huxley Close garage conversion — RSJ knockthrough in progress
Huxley Close — RSJ knockthrough during structural alterations
9

Step 9: Build A Continuous Insulated Envelope

A comfortable conversion needs more than insulation between studs. The aim is a continuous thermal envelope around the floor, walls and roof or ceiling, coordinated with moisture control and ventilation.

Walls

Existing single-skin masonry, cavity walls and timber structures require different solutions. The design may use an independent internal lining, an insulated cavity system or another approved build-up. It must account for the condition of the outer wall, exposure, moisture risk, services and usable room width.

Floor

Floor insulation must connect with the wall insulation at the perimeter. A warm central floor with an untreated edge can create a cold bridge, leading to surface condensation or mould at the skirting line.

Roof or ceiling

For a flat roof, pitched roof or vaulted ceiling, the placement of insulation, vapour control and ventilation depends on the roof design. Do not block an existing ventilation path or assume that packing insulation tightly against the roof covering is safe. A roof designer should check the condensation risk and required airflow.

Cold bridges and air leakage

Give particular attention to:

  • timber studs and rafters;
  • steel beams and lintels;
  • window and door reveals;
  • the base of the new frontage;
  • thresholds and floor edges;
  • the junction between the garage and house; and
  • service penetrations.

Thermal bridging is not solved simply by increasing insulation in the main wall area. Continuity at junctions matters, and a layer across framing may be required where specified. Sealed joints and properly detailed penetrations also reduce uncontrolled air leakage. Exact insulation thicknesses and U-values should come from the approved design and the version of Approved Document L that applies to the work. Product labels alone do not prove that the complete construction complies.

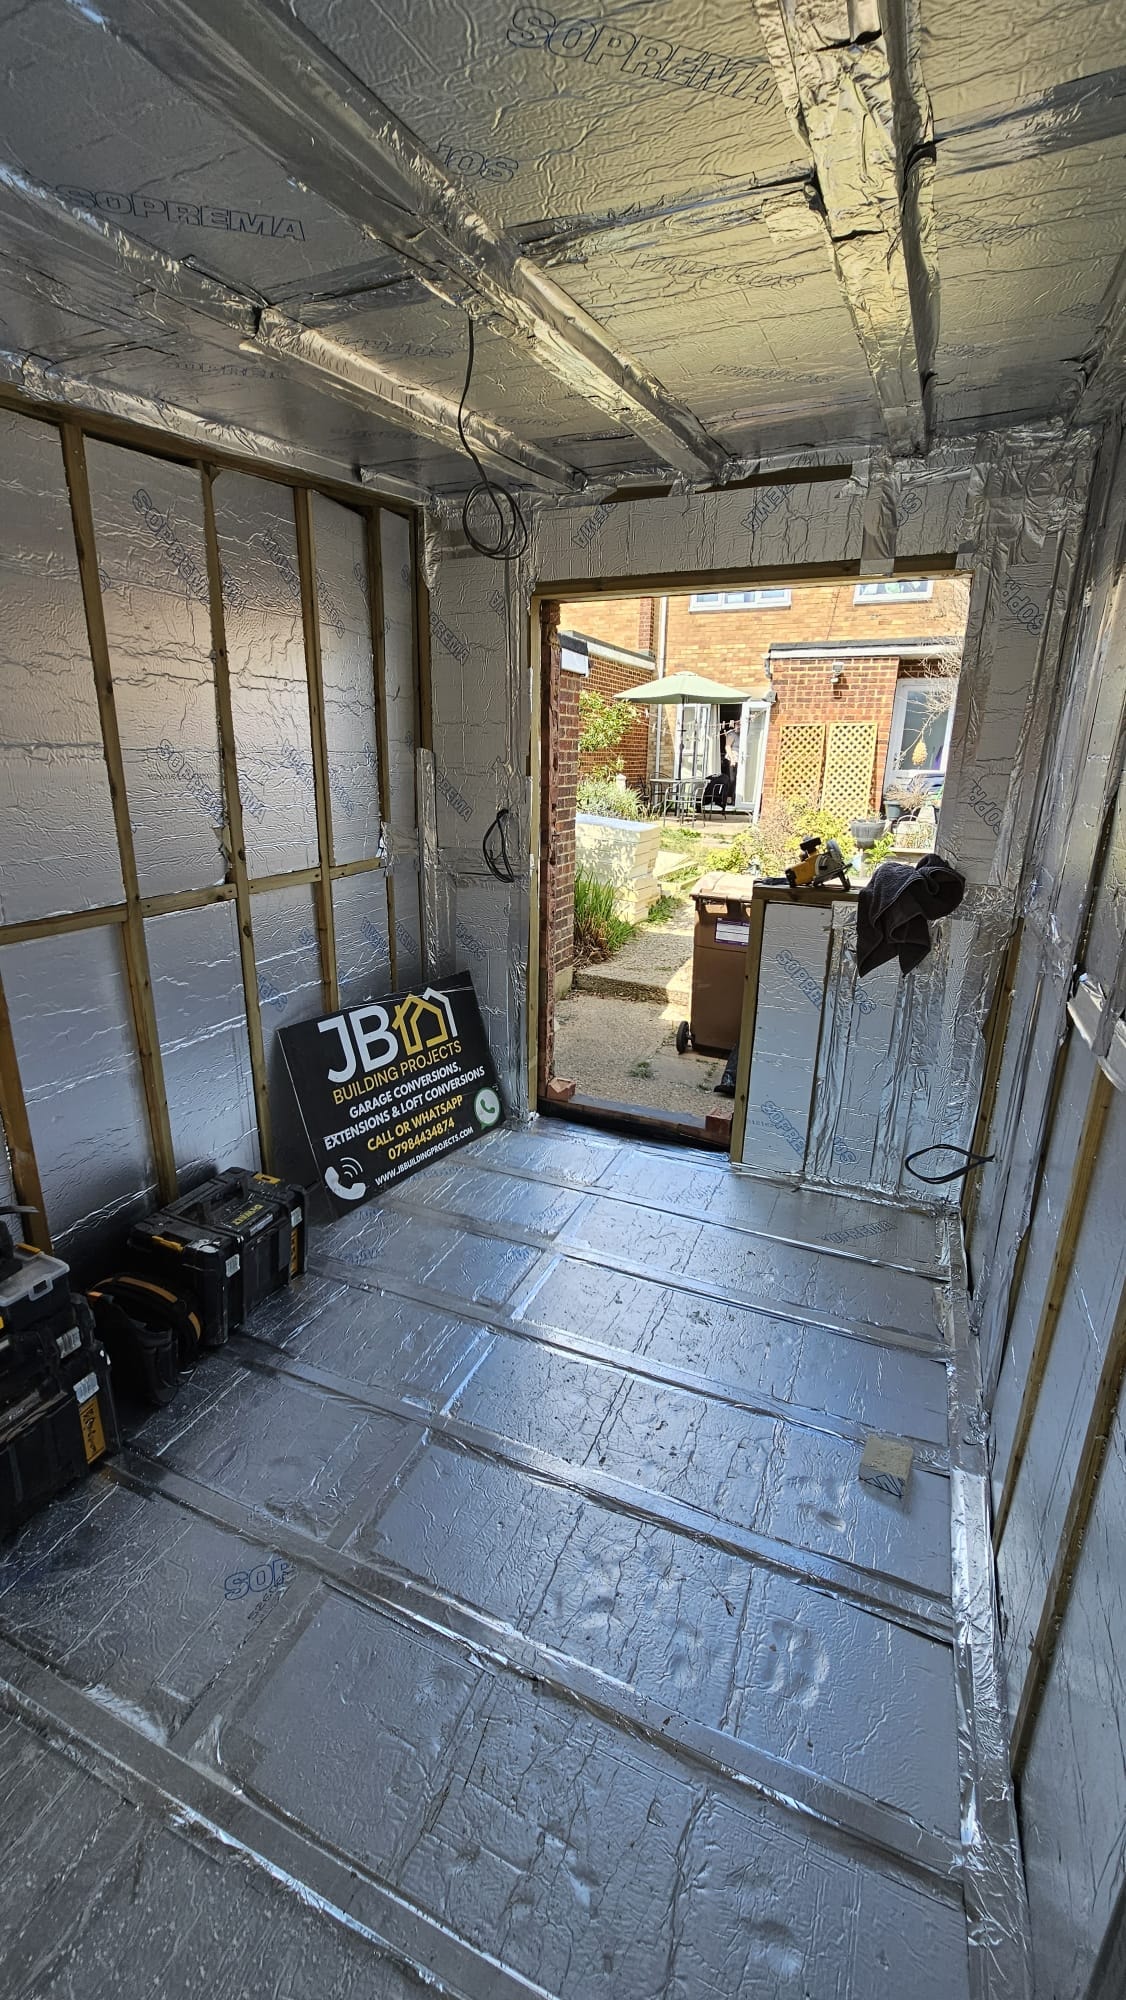
PIR insulation fitted and aluminium-taped during the Chelmsford partial garage conversion
Chelmsford partial conversion — insulation aluminium-taped before boarding
10

Step 10: Design Ventilation And Control Condensation

Insulation and ventilation work together. As a room becomes warmer and more airtight, it needs a deliberate route for fresh air and moisture removal.

The ventilation design may include:

  • background ventilators in windows or walls;
  • openable windows or doors for purge ventilation;
  • mechanical extract from a shower room, WC, utility or kitchenette;
  • retained roof, cavity or sub-floor ventilation; and
  • transfer air beneath internal doors where required.

Approved Document F covers ventilation for indoor air quality. Government guidance notes that poor ventilation can allow pollutants and moisture to build up, increasing condensation and mould risk. Do not confuse room ventilation with construction ventilation. An extract fan ventilates the occupied room; it does not replace the airflow required in a roof void, suspended floor or designed cavity. Similarly, a vapour-control layer is not a cure for an existing leak or a blocked ventilation path.

11

Step 11: Install Electrics, Heating And Plumbing

Coordinate the service routes before plasterboarding so that insulation and air-sealing layers are not repeatedly cut after installation.

Electrics

Plan the socket layout around actual furniture, workstations and appliances. Include lighting circuits, external lighting, smoke or heat alarms, data points and future capacity. Electrical work must comply with Part P and the relevant wiring regulations. Use an electrician who can inspect, test and issue the required certification or notify the work through an appropriate competent-person scheme.

Heating

The converted room should be included in a proper heat-loss assessment. Extending an existing radiator circuit, installing electric heating or using another system changes the electrical or heating load. The right answer depends on the insulated envelope, glazing, room size and existing system capacity. Gas work must be completed by a suitably registered engineer. Do not alter boiler flues, combustion ventilation or gas pipework without competent design and installation.

Plumbing and drainage

A shower room, utility or kitchenette adds complexity. Confirm water pressure, hot-water capacity, waste routes, falls, ventilation, waterproofing and access for maintenance before fixing the layout. New drainage should be agreed with building control and tested before it is concealed.

12

Step 12: Complete Fire-Safety And Escape Provisions

Fire-safety requirements depend on the position and intended use of the new room, the storey layout, the route to the final exit and the relationship with any retained garage area.

The design may need to address:

  • smoke or heat detection and alarm coverage;
  • an escape window or suitable alternative means of escape;
  • fire separation from a retained garage or higher-risk area;
  • fire-resisting doors, walls, ceilings or structural protection;
  • internal linings and concealed cavities;
  • safety glazing; and
  • the effect of a new opening on the existing escape route.

A ground-floor room with a direct external door may have a different solution from a bedroom reached through an inner room. Do not select fire doors or plasterboard specifications in isolation. Have the complete layout reviewed against the current Approved Document B and the building-control requirements.

13

Step 13: Plasterboard, Plaster And Finish The Room

Technical work should be inspected and recorded before it disappears behind plasterboard.

The board specification may differ between ordinary walls, ceilings, bathrooms, fire-resisting construction and acoustic partitions. Fixings, joints, service penetrations and junctions must follow the designed system. A moisture-resistant board is not a substitute for a properly designed wet-area waterproofing system.

Once the inspected layers are closed, the typical finish sequence includes:

  1. plasterboarding and joint treatment or plastering;
  2. drying and mist coating;
  3. second-fix electrics, plumbing and heating;
  4. internal doors, skirting boards and architraves;
  5. fitted storage, bathroom furniture or kitchenette installation;
  6. floor preparation and final flooring; and
  7. decorating, sealants and snagging.

Luxury vinyl tile, laminate, engineered timber, carpet and ceramic tile all need different subfloor tolerances and moisture conditions. Confirm these early; a visually flat garage floor may not meet the flooring manufacturer's requirement.

Finished interior of the Chelmsford partial garage conversion
Chelmsford partial conversion — finished interior after plastering and decoration
14

Step 14: Inspections, Testing And Completion Certificate

Agree inspection stages with the building-control body before work starts. Typical inspection points may include excavation or existing foundations, damp protection, drainage, structural steelwork, insulation before covering, fire-protection details and the completed room. The actual sequence is project-specific.

Keep a handover file containing:

  • approved plans and structural calculations;
  • photographs of concealed foundations, membranes, insulation and services;
  • product information and warranties;
  • electrical and heating certificates;
  • window and door certification where applicable;
  • drainage or ventilation commissioning information;
  • records of agreed design changes;
  • the final snagging list; and
  • the building-control completion certificate.

GOV.UK warns that, without the necessary approval, homeowners may not have the compliance certificates needed when selling their home. Do not treat verbal acceptance during an inspection as the completion certificate. Ask for the final document and store it safely.

How Much Does A Garage Conversion Cost?

Cost depends on size, condition, access, structure, specification and the intended use. A dry office within a sound integral garage is very different from a double conversion with structural openings, a bathroom, drainage, bespoke glazing and major floor work.

At the time of writing, JB Garage Conversions uses the following indicative starting guides:

Conversion typeIndicative starting guide
Partial garage conversionFrom £11,000
Full single garage conversionFrom £14,000
Double garage conversionFrom £20,000+

These are not fixed quotations. Costs rise where the project includes major foundations, steelwork, extensive drainage, roof reconstruction, premium glazing, bathrooms, kitchen fittings, whole-floor levelling or high-end finishes. Building-control fees, structural engineering and specialist surveys should also be identified clearly in the quotation.

For a more detailed breakdown, see our guide to garage-conversion costs in Essex.

How Long Does A Garage Conversion Take?

A straightforward build may take only a few weeks on site, but the total project period also includes surveys, design, quotations, permissions, material lead times and inspection availability.

StageTypical planning allowance
Initial survey, brief and quotationApproximately 1–2 weeks
Design, structural input and building-control preparationApproximately 1–4 weeks, depending on complexity
Planning decision, if an application is requiredSubject to the local authority and application type
Partial conversion constructionOften around 2–3 weeks
Full single conversion constructionOften around 3–5 weeks
Double or structurally complex conversionOften around 4–8 weeks or more

These are working guides rather than promises. Bespoke windows, drainage changes, wet rooms, structural discoveries, weather and inspection timing can extend the programme. A realistic schedule should show the critical sequence rather than simply quote the shortest possible completion time.

Common Garage Conversion Mistakes

Before starting work, use our garage conversion mistakes checklist to review common gaps in surveys, moisture control, specifications and completion records alongside the construction steps in this guide.

Starting before the floor and foundations are understood

The new frontage, finished floor level and headroom all depend on what is beneath the garage. Early investigation prevents costly redesign after materials have been ordered.

Treating planning permission and building regulations as the same thing

Planning considers the acceptability of development. Building regulations set minimum standards for how relevant work performs. A project can need one, both or additional consents.

Hiding damp instead of solving it

Studwork and plasterboard can conceal staining temporarily while moisture continues to damage the construction. Fix external defects and design proper DPC, DPM, cavity and ventilation continuity.

Installing insulation without addressing cold bridges

Gaps at reveals, thresholds, steelwork and floor edges can undermine otherwise generous insulation. The complete envelope must be designed as a connected layer.

Blocking ventilation paths

Roof, wall and floor airflow can be lost when voids are packed without a coordinated design. This can increase condensation risk in concealed timber.

Letting services damage the thermal envelope

Repeated drilling and cutting after insulation installation creates air leaks and weak points. Coordinate routes and use designed penetrations.

Covering work before inspection

If building control or the certifying trade cannot see the work, sections may have to be opened again. Confirm hold points and photograph concealed details.

Choosing a quotation on price alone

Compare scope, materials, technical details, certificates, exclusions and change-control process. The cheapest price may omit the work required to turn a garage into a genuinely habitable room.

What A Good Garage Conversion Should Achieve

A successful conversion should feel like part of the house rather than a decorated garage. It should be:

  • structurally suitable for its new use;
  • dry and protected from ground and weather moisture;
  • warm, with controlled thermal bridging and air leakage;
  • properly ventilated without compromising hidden voids;
  • safe in fire and equipped with an appropriate escape strategy;
  • supplied by tested and certified services;
  • finished to a consistent standard; and
  • supported by building-control and trade documentation.

You can see these principles in practice in our Huxley Close full-conversion case study and Chelmsford partial-conversion case study.

Completed Huxley Close garage conversion showing bifold doors and finished room
Huxley Close — completed conversion with knockthrough bifold doors

Frequently Asked Questions

Disclaimer: This guide provides general information for homeowners in England. It is not legal advice, a building-regulations specification or a substitute for a site survey. Requirements and safe construction methods are property- and date-specific.

Plan Your Garage Conversion With JB Garage Conversions

Every garage is different. The safest way to establish the real scope is to inspect the structure, floor, roof, access, drainage and proposed layout before producing a detailed quotation.

JB Garage Conversions provides a fully managed service for locations normally within about one hour of Harlow; Cambridge is a specific service-area exception. We can help coordinate the survey, quotation, building-control process, construction stages and final sign-off.

Or explore our complete garage-conversion services